Creating an Accessible Bathroom


The way we live in our homes today, and how aging well has become so important that builders, renovators and homeowners are starting to pay more attention to creating an accessible and universal design plan for today’s generations.  Products, design details and materials now reflect todays needs in meeting accessibility requirements of older adults and those with mobility challenges, and no longer look institutional.

Safety and design have become paramount in bathrooms, as we’ve seen statistics of fall related injuries and the demographics of the many people visiting emergency rooms because of their falls.  Today, more than ever as we are spending more time in our homes, we want our loved ones and neighbours to be injury-free in the most used rooms.  With a legacy surpassing 150 years of excellence, we’ve put together a list of things to consider in your bathroom design to allow customers at any stage of life maintain safety, comfort & independence regardless of mobility limitations.

Access:  If your bathroom doors are less than 32” wide, you may have difficulty in passing through them, whether you are carrying towels if you are using a walker or wheelchair.  Optimal door widths to accommodate people and daily aids to living are 34”-36”.  There are different types of doors-pocket doors, hinged doors, or even sliding barn-type doors have made a presence in today’s renovations.  If you are a fall risk, consider reversing the hinge of the bathroom door to open out of the bathroom instead.  If you were to fall behind the door, EMS will be able to reach and assist you faster.

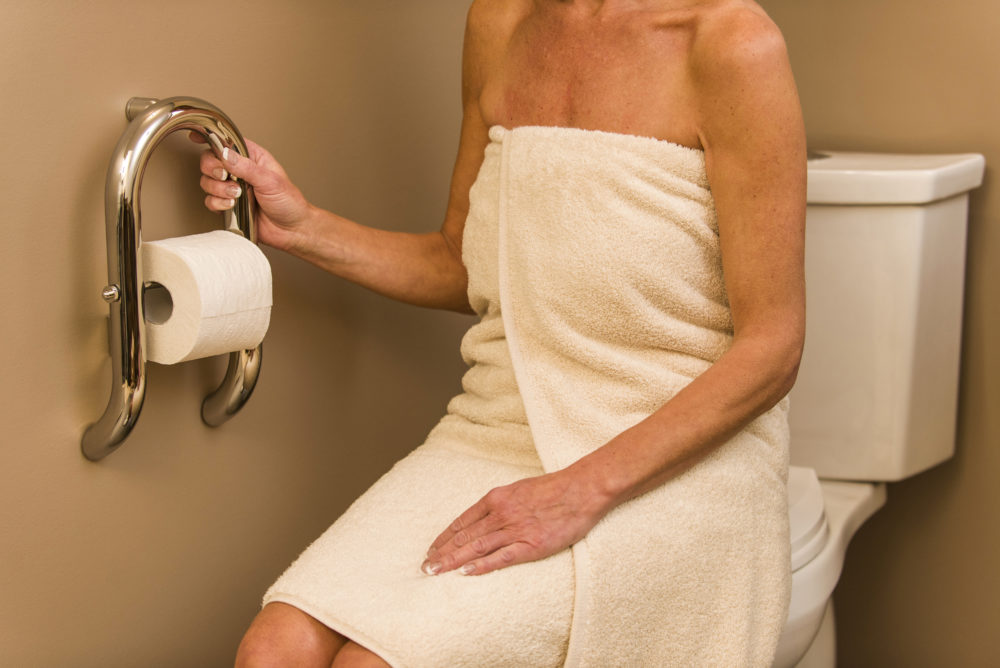
Grab Bars:  Bathrooms have been identified as the leading room where people have sustained falls & injuries resulting in ER assistance, that they’ve sustained while bathing/showering, getting in/out of the bathtub, tripping or while toileting.  Adding a Superpole, grab bar, or decorative support accessories used specifically for lateral support, can greatly reduce the risk of falling.


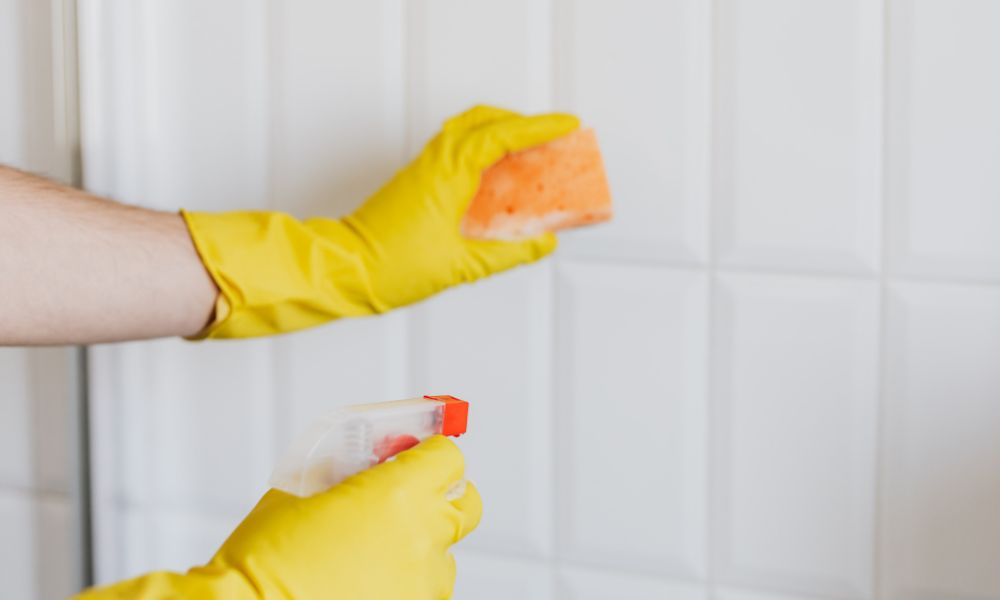
Easy to Clean Surfaces:  as people age, it becomes more difficult to clean and maintain high maintenance surfaces such as stone, tile/grout, and glass.  Choose materials that are easy to clean.  There are plenty of choices, and these can still match your new bathroom décor.  When it comes to germs, it’s important to stay on top of keeping things clean.


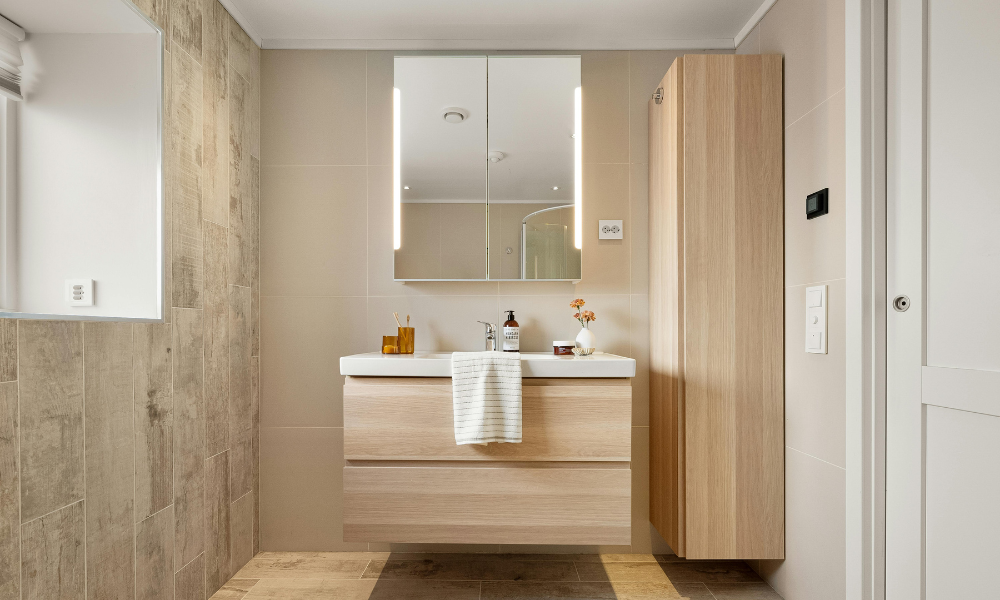
ADA Toilets and Accessible Countertops:  Getting older means that you make have stiff joints or knees that have been replaced.  Choosing toilets that have a taller seat height makes them more comfortable and accessible for all.  Closer to a 17” chair height will be more helpful during all the ups and downs that you will incur.

Countertops and right-height pedestal sinks that are 34” high, help reduce strains on knees and backs from prolonged use and standing.  Providing a multiple-height counter will be more inclusive to the needs of everyone in the home, from young children to those who need to sit in front of a counter with knee space below.


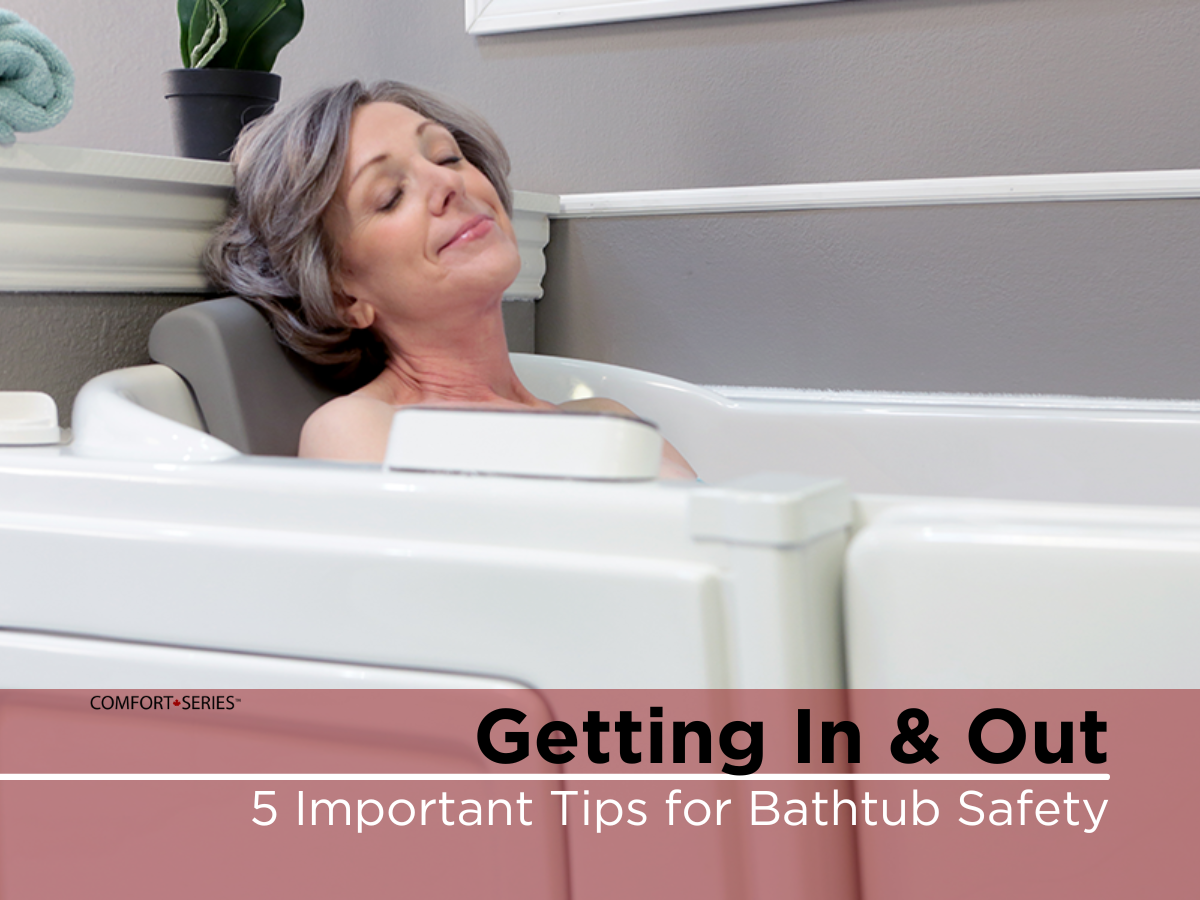
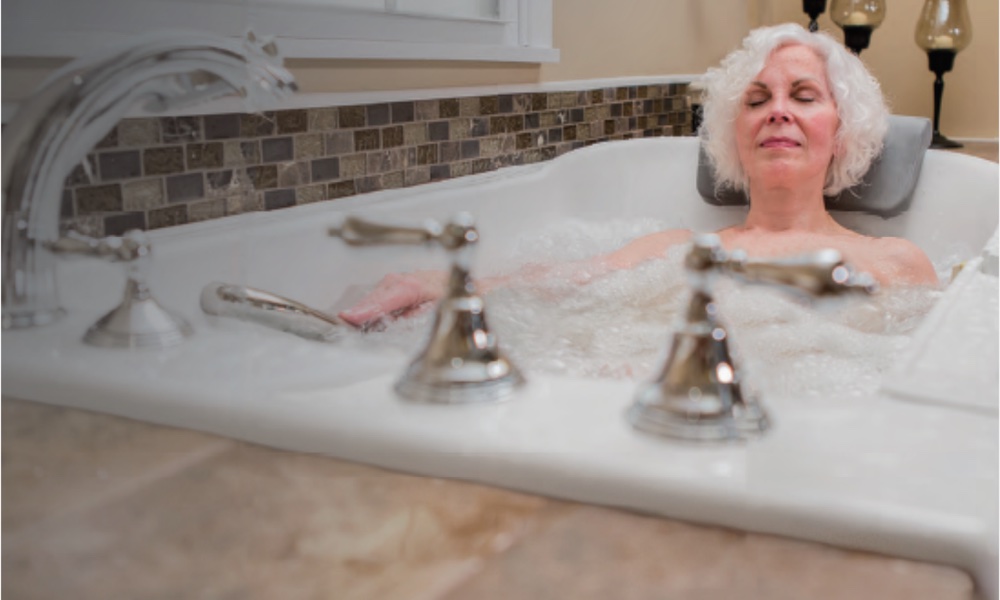
Accessible Bathtubs or Low/Zero-entry Showers: Joint stiffness, mobility challenges, frailty and balance issues will make getting in and out of a bathtub and shower difficult, if not resulting in falls.  A zero-entry shower pan or constructed floor is a better option as you don’t need to lift your legs over a threshold to walk into the shower.  However, you will need a seat, whether built-in or freestanding.  Seats need to be positioned close enough to the shower valve and/or hand shower so that the user is not over-reaching.  Just be careful to allow for access to easily move in and out of the shower; and be careful when using glass walls if you have visual challenges.


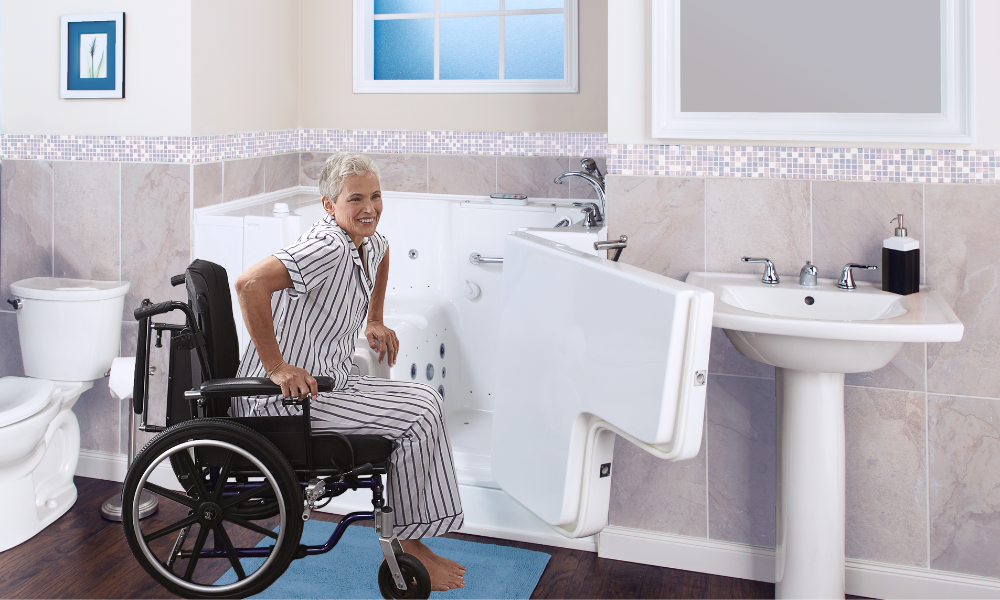
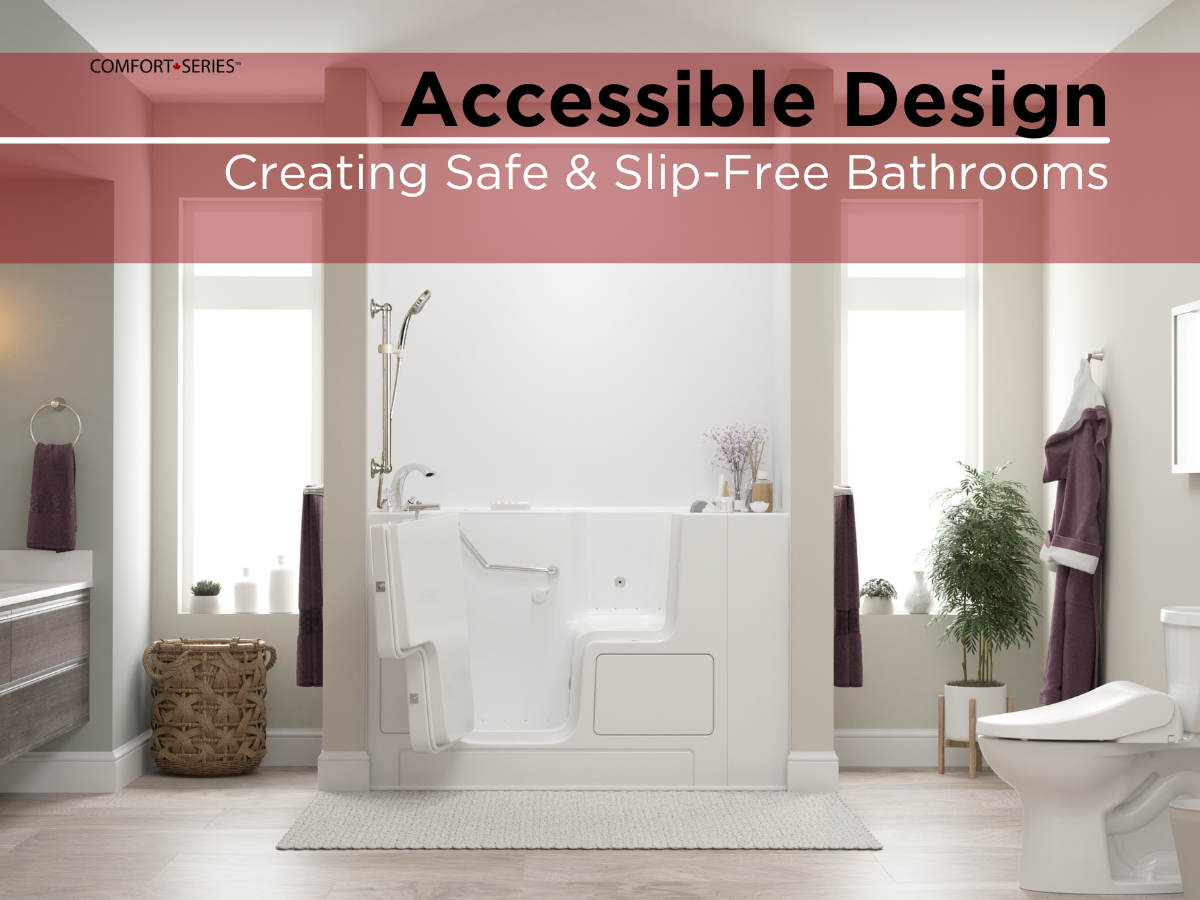
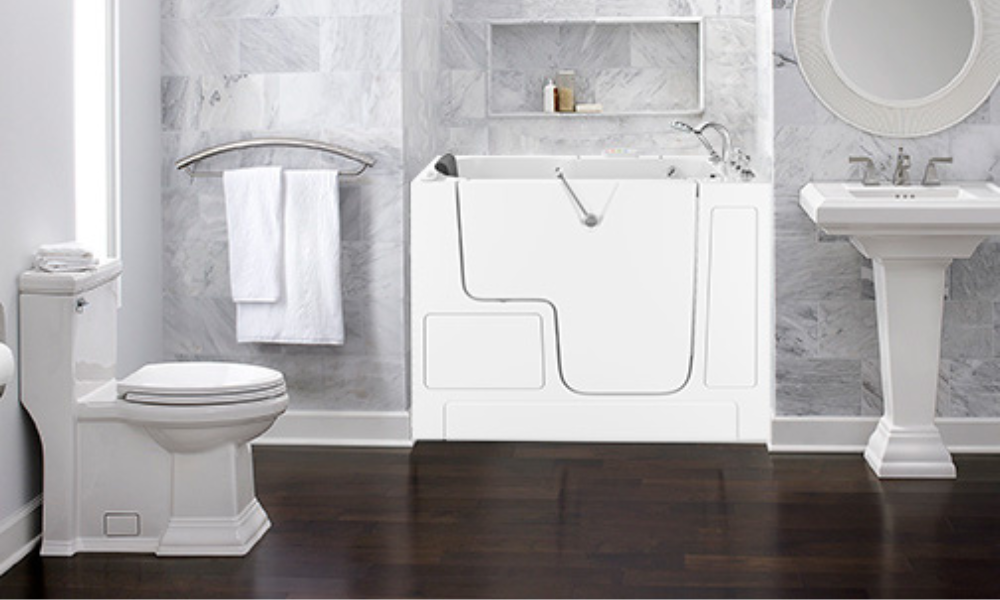
An accessible bathtub with an outward opening door is a better option because it is fully accessible even to wheelchair users, and the built-in integral seat will not move.  On a ComfortSeries™ bathtub, all the controls are within-arms-reach, and a door prevents a bather from falling out, even if standing to shower.


Single Lever Faucets:  Selecting a faucet with lever handles makes the faucet easier to operate for limited grip strength, and by choosing a single-lever faucet, it makes it that much easier.

Lever Handles:  If you have arthritis or any other grip-preventing challenge, you know that round door knobs are difficult to turn; replacing all your door handles with lever style, will make it easier and more comfortable to use as your needs change.  There are several finishes that can match your faucets, or other finishes in your home.


Storage Space:  Bathroom cabinets and countertops can easily become cluttered with medications, products, and other daily essentials.  This in turn makes it harder to clean and access your bathroom.  Plan for proper storage of necessities, in easy-to-reach locations.  Keeping it organized means that you will know where each item is, where and when you need it.


Non-Slip Rubber-backed Bath Mat:  Any rug in a bathroom is a trip hazard, especially if it moves.  However, if you place a rubber-backed rug by your bathtub or shower, it will be handy to prevent any slips from wet feet.


Universal Design doesn’t mean it has to look institutional, and in fact could look like a spa bathroom; just safer and more accessible.  As more Older Adults continue to age, bathroom and home designs will continue to evolve and improve to accommodate accessible design elements.

With American Standard’s luxurious ComfortSeries™ accessible and walk-in tubs, stylish easy-to-use faucets, and RightHeight® toilets, you can create a beautiful bathroom that safely and comfortably supports independently remaining at home.


Are you considering including an accessible walk-in bathtub?  Get a free estimate for the best walk-in tub in Canada, by clicking the button below.


More Information & FREE Estimate


5 Important Tips for Getting In and Out of the Bathtub Safely


When you combine slippery tile or laminate flooring with running water, soap, confined spaces, and lots of dangerous corners, it should come as no surprise that according to the Canadian Institute for Health Information (CHI), every day last year, almost 1800 over the age of 15 reported Emergency Room visits, and 417 hospital admissions due to falls.

The National Institute on Aging states that 80% of falls occur in the bathroom, with 35% directly related to bath or shower related accidents; injury frequency increasing exponentially with age. Getting in and out of the bathtub the right way is an important consideration that can help reduce the number of ER visits each year.

Let’s look at five important bathroom safety tips for getting in and out of the bathtub carefully.

Think non-slip:

Throughout the bathroom, and especially near the tub or shower, make sure that all floor surfaces have non-slip rugs or mats to minimize the chance of slips or falls when it comes to bathtub safety. Throw rugs with non-skid backing may work, but look for microfiber or gel-filled rugs instead. These choices feature very grippy bottoms that hold onto tile or smooth floor surfaces best.

Grab bars are a must:

One of the easiest and most affordable tips is to install at least one grab bar on the adjacent wall, or a properly secured floor-to-ceiling SuperPole. More than just providing stability for seniors and young kids, grab bars are a good idea for all. Stay away from any grab bars that use suction cups, as these can often be more harmful if the suction cup slips even a tiny bit. Bolt-on units are much more sturdy and add a level of safety that stick-on units simply can’t achieve.

Install a walk-in tub: 

While more expensive, a one-time investment in a top-quality walk-in tub can minimize the risks posed by a standard, slippery bathtub. Users won’t have to hike their legs over a tall bathtub ledge, and most units feature built-in seats, convenient soap trays, and other features that minimize the need to reach for objects and assure bathtub safety.

Use a handheld shower wand:

Handheld shower wands can be attached to almost any shower head and are a great way for seniors to stay safe in the bathtub. Using a handheld shower wand means that you don’t have to remain standing for long periods of time under slippery soap and water run-off.

Keep proper form in mind:

Just as exercise is only safe and effective when proper form is maintained, it is also important to enter and exit the bathtub using a specific series of movements. When entering the bath, hold onto the ledge and place one leg over while squatting down slightly to lower your center of gravity. Then, pull the other leg over as you maintain your grip on the ledge. Slowly lower to your knees, while holding onto the ledge, and then move into your resting position. Exiting the bath is simply the reverse.

A walk-in tub is one of the safest additions to any home, and combining this unique bathroom fixture with grab bars, appropriate bathroom flooring, a bath chair, and common-sense bathtub safety steps can dramatically reduce the number of ER visits each year.

How Caregivers Can Help

As a caregiver, you are responsible for the safety of your loved one. Helping them get in and out of the bathtub safely, without getting hurt is key. Below are some things to consider when helping your friend or family member stay safe:

  • Provide sturdy handrails at key areas where they are getting in and out of the bathtub
  • Educate them on the benefits of a safe, senior-friendly walk-in tub
  • Help keep the floors dry and the bathroom clean
  • Arrange toiletries so they are within reach
  • Ask your loved one how you can help make their bathroom safer

These are just a few tips that will help seniors be safe in the bathroom and notes on how caregivers can help! To learn more about bathroom safety, explore BATHCARE, and  discover Canada’s BEST Walk-in Tub for the safest bathing experience!


Safe Workouts for Seniors


We all have New Year’s Resolutions and if one of yours is to incorporate more exercise into your routine, these workouts for seniors can help! There’s no reason to make excuses because in as little as 15 minutes, you can get moving and enjoy the many benefits of exercise.

Let’s look at some safe, effective 15-minute workouts for seniors!

A Walk Outside (or on the Treadmill)

The easiest (and most affordable) way to get moving is just to take a walk outside. Or, if the weather doesn’t permit this winter, take a walk on the treadmill. This exercise should be no more than 60-75% of your maximum heart rate (which is 220 minus your age). Aim for this fat burning zone to both burn calories and increase your cardiovascular strength. For example, if your target heart rate is 165 bpm, a brisk walk should do the trick. If you’re inside, try turning up the incline to imitate walking up hill. This will help raise your heart rate and stimulate more muscles in the legs and glutes.

Wall Push Ups

Regular push ups might be hard for some people, but wall push ups are the perfect upper body workout for seniors because they are low impact for sensitive joints, safe, and effective. Simply stand in front of a sturdy wall about two feet away. Place your hands on the wall at shoulder height. Keep your body straight and bend your elbows so your body leans in toward the wall. Stop with your face as close to the wall as you can get, then push yourself back up. Watch a video demonstration of wall push ups here.
For your full 15-minute workout, try doing 50 seconds of the exercise with 10 seconds rest. You can combine wall push ups with other upper body work, like bicep curls with household items.

Chair Squats

Squats are a great way to work the hamstrings and glutes, but bending down to the ground to do a full squat might be out of the question. But, that doesn’t mean you have to give up this beneficial exercise. In fact, squats are one of the best workouts for seniors because they help improve functional movement that you use every day.

For chair squats, simply set up a sturdy chair and stand about a foot in front of it. Keeping your back straight and your chest upright, sit back into the chair. Instead of putting all your weight down, try to just touch the chair with your glutes and then stand back up. This continuous tension will help your muscles grow! If you want to step it up a notch, try adding some dumbbells for extra weight. Just make sure to stretch it out before and after your workout to avoid injury.

Dance

There are countless dance classes at the gym, but you can have a dance party right in your own living room and get a great workout! If you’re serious about getting your dance on, there are plenty of online resources to learn how to dance. Or, simply put on your favorite playlist and get moving! Don’t worry about looking a little silly, we all need a laugh or two here and there.

Back Leg Raises

While you have your chair out from your chair squats, let’s add another lower body workout for seniors. Back leg raises are a great move to work the hamstrings and glutes and a similar movement is used in a lot of barre, yoga, and ballet classes.

Stand behind a chair and slowly lift one leg straight back without bending your knees or pointing your toes. Instead, flex your foot downward. Hold that pose for one to five seconds, depending on your strength level. Repeat this 10-15 times per leg. If you want to try mixing it up, pulse five times while your leg is at its highest point to maintain tension in the muscle. More variations can be found in this barre-inspired video. You’ll have a better shaped behind in no time!

Age is just a number when it comes to moving your body. This year, ditch the excuses and try these workouts for seniors right in your own home. Build a complete workout routine to improve your activity.

To help you relax after your exercising program, rejuvenate your body and relax your mind in a hot bath.  A ComfortSeries bathtub can help your body recover.

Want to learn more about the best walk-in tub in Canada? Click the button below to get a free estimate!

Get FREE Estimate

*Health experts suggest that you talk to your doctor before you start an exercise program.


9 Best Stretches for Older Adults

As you get older, taking care of your body is even more important. Stretching is a great way to alleviate tension and pain in your lower back, strengthen your core and back muscles, and maintain your agility. Let’s look at some of the best lower-back stretches based on yoga poses to include in a daily routine. As always, check with your doctor before starting a new exercise routine, and stop a stretch if you ever feel uncomfortable.


1.Child’s Pose

Level: Easy

Child’s pose is a classic yoga pose that helps release tension in your lower back, and it also stretches your shoulders and upper back. To get into child’s pose:

  • Grab a yoga mat and get on all fours.
  • Sit your hips back, leaving your arms outstretched in front of you.
  • Get as close as you can to having your rear touch your feet. Your back should round and you should feel the muscles in your lower back release.

Watch how to do child’s pose here.

Modifications for Child’s Pose:

If getting into the full child’s pose is difficult for you, try the following modifications:

  • If you can’t get your hips to touch your heels, either because of injury or mobility issues, instead stretch your arms forward. You can also widen your knees (a little wider than hip distance), make sure your heels are still together, and send your hips back this way. This will help you get your hips a little further down.
  • If you find your neck straining in child’s pose, try putting a yoga block down and rest your head on it. That way, your head will be elevated and you won’t be forced to push it into the ground.
  • Lastly, if you don’t want to stretch your arms forward due to shoulder issues, you can always bend your arms parallel to your shoulders and rest your head on your hands.


2. Cobra Pose

Level: Medium

Starting with gentle spine flexion & extension in the Cobra pose will allow you to move to deeper bends with time.  Since daily life rarely requires you to move like this, backbends are essential for spinal health and longevity.

  • From a front laying position with your nose to the mat;
  • With hips staying on the floor, press down lightly with your hands, and lift your head and chest, rolling your shoulders back and down;
  • keeping your shoulders away from your ears, arch your back gently, adjusting the intensity of your stretch by straightening or bending your elbows.


3. Downward Facing Dog

Level: Medium

Downward Dog is a position that helps to stretch your hamstrings and shoulder muscles between back extension poses.

  • From the upward facing dog position, release the upward position and lower your shoulders towards the mat;
  • Curl your toes under towards your body to position on the floor;
  • Keep both toes pointed towards the front of your mat, and sink your heels towards the floor;
  • Lift your buttocks upwards towards the ceiling while pushing your arms straight. Your ears should be in line with your arms, and you should be in an inverted V position.

Keep your weight mostly in your legs and reach your hips high.

Modifications for Downward Dog Pose:

Soften your knees if you have tight hamstrings, but keep feet parallel. Be careful to move gently and slowly to prevent dizziness.


4. Bridge

Level: Medium to Hard

Bridge Pose is a gentle way to extend your spine.  It improves the mobility of your spine, and counters the effects of too much sitting.

  • Lay flat on the floor with your knees bent;
  • Try to position your heels as close to your buttocks as possible;
  • Arms will be at your sides, with palms facing down;
  • Tuck your pelvis towards your belly-button to engage your core;
  • Gently lift your buttocks towards the ceiling in your bridge position until only your shoulders are on the mat;
  • Hold for 10 seconds, and slowly reverse the directions until your spine is flat on the floor; repeat.

Remember to root into the feet, which helps your leg muscles to support the pose.


5. Seated Twist

Level: Medium

Gently twisting from one side to the other helps stretch your back and core. This stretch is best done while sitting up straight on the floor, or in a hard-backed chair. Simply:

  • Sit up straight in your chair.
  • Put both arms straight over your head, then take them both down to your left side. You can grab the back of the chair for a deeper stretch, or just twist as far as is comfortable.
  • Repeat on the other side by putting your arms straight up and bringing them down on your right side.
  • When twisting, look to the side that your arms are on. This will help stretch your neck, as well.

Watch how to do a back twist in a chair here.


Modifications for Back Twists:

If you can’t twist your body very far, that’s okay! An easy modification is to just twist as far as you are comfortable. Some people may be able to twist so far that they can look behind them, and some may only be able to twist as far as putting their hand on their hip. No matter where you are, only twist as far as you feel comfortable. Spine twists are very beneficial when done correctly, but care should be taken on this sensitive area.


6. Cat-Cow Yoga Pose

Level: Easy

Cat and cow are complementary yoga poses that arch your back and then let it drop. Cat-Cow may be the most important yoga pose that you learn, especially if you have back pain.  Here is how to do cat-cow pose on the floor:

  • Grab a yoga mat and get on all fours.
  • Gently tuck your tailbone and arch your back away from you, drawing in your core and pressing your spine to the sky. This is cat pose.
  • Then, tilt your pelvis back, drop your spine and arch your back into a reverse C shape, and look up to the ceiling. Push your hips up to really feel the stretch and increase the curvature of your spine. This is cow pose.
  • Alternate between the two to get the full range of movement, inhaling for cow pose, and exhaling for cat pose.
  • Cat pose pushes your spine to the ceiling, while cow pose arches your back and releases lower-back muscle tension.

Watch how to do cat-cow here.

Modifications for Cat-Cow:

For a simple modification, try doing the cat-cow pose in a chair rather than on the floor. This modification is great if you have shoulder issues. To do this move in a chair, simply rest your hands on the bottom of the chair, and look up to the ceiling and arch your back (cat), then look down at the floor and curve your back (cow).


7. Lying Spinal Twist

Level: Hard

This stretch is similar to the back twist, but it is done on the floor and uses the weight of your legs to deepen the stretch. How to do a lying knee twist:

  • Lay flat on the ground facing up with your arms spread to the side in a T shape.
  • Bend your right knee and let it gently fall to your left side. Keep your left leg straight.
  • Repeat by bending your left knee and letting it gently fall to your right side. Keep your right leg straight.

Watch how to do a lying knee twist here. To deepen the stretch, you can also bend both legs at the same time and move from from side to side, like shown in this video.

Modifications for Spine Twist:

We rated the lying spine twist as a hard level because it twists your back with the whole weight of your legs. While not a direct modification, a similar stretch is the Beauty Queen. Simply sit on the ground, bend one leg and cross it over the other, and look in the opposite direction. This stretch is easy to modify for your own flexibility and mobility because you can adjust your leg (drawing it closer in is harder) and twist only as far as you need. This is still a more advanced stretch, but it’s a good alternative if you don’t want to do the lying knee twist on the ground.


8. Seated Forward Bend

Level: Medium to Hard

This pose offers a stretch to the entire back of the body. Hamstrings tend to get short and tight in people who sit a lot, which can contribute to lower back pain.  Seated with your legs straight in front of you.

  • Keep your shoulders down and away from your ears as you bend from the hips, not your waist;
  • keep your neck aligned with your spine.


9. Happy Baby Pose

Level: Easy

The happy baby pose is a great way to finish your stretching session.  The deeper you draw your feet toward you, the more you stretch your pelvis, relieving back pressure.

  • keeping your sacrum flat on the mat, pull your feet up so that your shins are perpendicular to the floor;
  • using your hands, grip the arches of your feet and gently draw them towards your armpits;
  • hold this pose for 30 seconds or longer to release tension and tightness.


Take Your Stretching Further

Once you feel comfortable with your lower-back stretches, you can take them up a notch by stretching in the bath. Warm baths have been loved for their therapeutic properties for centuries because of the water’s buoyancy and relaxing properties. Usually the cause of lower back pain is muscle-based (unless you have a specific injury or ailment), and warm water relaxes your muscles so you can deepen your stretches. Try some gentle stretching, such as the back twist described above, in your walk-in tub for a full-body release. Your lower back will thank you!

Refresh Your Bathroom


Spring is the perfect time to deep clean your bathroom and get a fresh start for the new season. If you’re like 42 percent of people, you might dread spring cleaning.  While it may not be enjoyable, 94 percent of Canadians feel a strong sense of accomplishment once it’s completed.

Bathrooms rank as the highest cleaning priority (including scrubbing grout & tiles), followed by decluttering, scrubbing large kitchen appliances, and washing windows.  -Ipsos Survey 2022

With the following simple and effective bathroom cleaning hacks, you’ll never struggle to get into spring cleaning mode again — and your bathroom will never look better!

Health and Safety First

This spring cleaning season, be sure to look after your bathroom and yourself. As you start cleaning take the following precautions into consideration:

  1. Don’t mix cleaning products. Certain chemicals can react to create toxic fumes or burn your skin.
  2. Keep your bathroom well ventilatedno matter what cleaning products you’re using.
  3. Protect yourself against chemicalsby wearing rubber gloves and eyewear.
  4. Wear old clothes to clean.Chemicals such as bleach can discolor fabrics.
  5. Don’t use abrasive cleaners and tools.These can damage the items in your bathroom.
  6. Fully remove cleaning products after use as they can leave a residue if they are not wiped or rinsed off.

How to Clean Your Bathroom Step by Step

Vent

The phrase out of sight, out of mind often applies to the bathroom vent. These vents are usually found high up on the wall, which means you might not have noticed how much dust, mold, and mildew they have accumulated. Give your vent a thorough cleaning inside and out. Just remember to shut off the circuit breaker before you get started, and get help if you use a ladder!

Bathroom cleaning hacks:

  • Soak the vent cover in warm water and dish soap
  • Wipe the blades with a damp cloth
  • Remove the dust from inside the vent with a toothbrush
  • Use a vacuum nozzle attachment to suck up the dust
  • Replace the cover only when it is completely dry

Cabinets and Countertops

Bathroom cabinets and countertops can easily become cluttered with medications, products, and other daily essentials. This in turn makes it harder to clean your bathroom. This spring, seize the opportunity to clear out these areas for a cleaner bathroom and greater peace of mind.

Here’s how to organize your bathroom counter and cabinet:

  1. Remove everything and clean the areas with a damp cloth
  2. Discard any products that are empty or past their use-by dates
  3. Place new items at the back of your cabinet so you finish open products first
  4. Only keep the bare essentials on the countertop


Sink

The sink drain has more bacteria than any other part of your bathroom, so a deep clean is just what the doctor ordered. You only need a few minutes to transform this part of your bathroom into a sparkly, germ-free space.

Bathroom cleaning hacks:

  • Pour white vinegar down the sink and flush with hot water
  • Clean faucets with disposable disinfecting wipes to avoid spreading germs
  • Use dental floss to remove the grime from where the fixtures join the sink

Toilet

When we think of cleaning the bathroom, the most obvious task is to clean the toilet. With these tips, you can clean your toilet without too much bending.

Bathroom cleaning hacks:

  • Clean the seat and handle with disposable disinfecting wipes
  • Pour one cup of baking soda into the toilet bowl and brush
  • Let the baking soda sit for about 30 minutes before flushing

Shower

Cleaning your shower can be a big job. It doesn’t just include the shower head, but also the tiles and grout on the walls and floor of the showering area. Fortunately there are a few tips and tricks to get great results without too much manual labor.

Bathroom cleaning hacks:

  • Spray tiles with a cleaning spray and then turn on the shower until it steams
  • After 20 minutes, wipe the tiles with a cloth
  • Scrub stained grout with a toothbrush dipped in bleach, then rinse well
  • Place your shower head in a bowl of white vinegar for a few hours
  • Remove the shower head and rinse well


Bath

A soak in the bath is all the more satisfying after you have spring cleaned your bathtub. The best part is, these tips include only natural cleaning products.

Bathroom cleaning hacks:

  • Spray the tub with a solution of 50% white vinegar, 50% warm water
  • Apply a baking soda and white vinegar paste to stains
  • Apply a borax and lemon juice mixture to rust stains
  • Rinse the tub well after 30 minutes


Does your bath need more than a deep spring cleaning? There are a few options you can consider.

Reglazing: This is a great way to spruce up a relatively new bathtub with some scratches. A specialist will sand down the surface of your bathtub and fill in any cracks. They will then apply primer and paint before buffering. This process can only be done once, however, and can’t fix any significant issues.

Adding Bath Liners: Liners can improve the look of bathtubs that have large cracks and missing tiles. The style and shape of liners are limited, so you wouldn’t be able to line an old, free-standing bathtub or customize to your heart’s content.  But be careful, because between the original bathtub and the liner is a known mold/mildew growth site.

Replacing Your Bathtub: Although it’s the most expensive option, replacing your bathtub is the best way to get exactly what you want for your home and lifestyle. That’s the ultimate fresh start!

Considering upgrading to a walk-in tub? Get a free estimate for the best walk-in tub in Canada by clicking the button below.

Get FREE Estimate

Sleep Health

Do you ever wonder why you lay in bed wide awake, when your body knows that it should be getting at least 7 hours of restful sleep?

Well it turns out, that there are several elements that can hinder your precious shut-eye, and here are some tips to help you cope and remedy wakefulness.


There are three types of Insomnia; which one relates to you?

  • Transient (symptoms are less than 1 week)
  • Acute (short term symptoms)
  • Chronic (long term symptoms)


Statistics show that 20%-30% of Canadian adults struggle with sleep issues, and 50%-60% of those are related to medical and mental ill health.  Older adults are more susceptible to insomnia, and suffer from sleep deprivation for a number of reasons: age, anxiety, worry, hormones, digital devices, illness, inflammation, injury, and nighttime bathroom visits.


What is Insomnia

Insomnia is a sleep disorder that can make it hard to fall asleep, stay asleep, and waking through the night, preventing you from falling back to sleep.  We need 7-9 hours of restful sleep for general good health and cognitive functioning.

Not getting a recommended 7+ hours of sleep regularly can leave you feeling foggy, irritable, depressed, confused, and at a higher risk of accidental falls.

According to the Sleep Foundation, those suffering from chronic insomnia are at a 20% increased risk of stroke and heart attacks.


Causes

There are several risk factors that can cause insomnia such as age, family genetics, the environment that you live and/or work in, the one you sleep in, your lifestyle in general, and the condition of your health.  A lack of sleep can affect your daily energy level, your mood swings, memory, concentration, decision-making and work performance.

We know that when we lack sleep, it can worsen your immune response, contribute to heart problems, blood pressure increases, mental health, cognitive decline and dementia.

For some, chronic pain and inflammation is the number 1 reason for their reduced Quality of Life and sleep deprivation.  Addressing pain directly could be the most important method to of tackling the source of your insomnia cycle, and promote self-healing.


Lifestyle Contributors

Address and review the activities that you participate in; what and when do you eat, how you exercise, what your hobbies are; do you actively listen to world events, news, COVID; are you socializing, and what medications you are taking?


Tips to Manage Insomnia Symptoms

The goal is to change and establish a regular sleep cycle.  One that will allow you to get a more restful night, recondition/reset your body’s time clock, and have a healthier and fresher next day to prevent illness and injury.

  1. Schedule your bedtime routine. Identify when you will go to sleep, and when you will wake; be consistent each day.
  2. Consume lighter meals at dinnertime, with reduced spices that can cause acid reflux.
  3. No caffeine after noon, and no alcohol.
  4. Keep your bedroom 2 degrees cooler at night. Your body’s temperature will adjust when you sleep.  Using blankets is a better way to warm your core during wind-down time.
  5. Take a hot bath & soak 2 hours prior to bedtime. This will condition and prepare your body to know that sleep will be imminent.
  6. Wind-down 1 hour prior to bedtime. Turn off TV or other stimulator sources like phones or tablets.
  7. Keep your bed for sleeping only. Don’t bring work or projects with you to bed.
  8. Remove artificial light and sounds from your bedroom (ie electronic devices, video games, tv’s).
  9. Practice mindfulness and breathe deeply before and after lights go out.
  10. Seek assistance for persistent chronic pain.


Did You Know?

A warm bath within 2 hours of your bedtime, can help promote a relaxed state by decreasing your body’s heat levels.  Here’s the science.


Exercise & Mindfulness

During the day, it’s important for you to get plenty of fresh air and sunlight, or light therapy and to stay hydrated, so that your muscles and joints are amply lubricated.  By being active and exercising in the morning, it will help blood flow and circulation early, preventing late night excitement and restless legs. Participating in Yoga, meditation, and relaxation activities in the afternoon or early evening can start your body in transitioning to a more calm and peaceful state that is more encouraging of a regular sleep cycle.


Not everyone can eliminate work or environmental stressors, but helping to manage it will better support your physical health and mental well-being; and hopefully, a better, more restful night’s sleep.


Learn more about ComfortSeries™️ bathtubs, and how they can help you improve your sleep cycles.